Showing posts with label art materials. Show all posts

Thursday, July 6, 2017

Copies of vintage papers in new junk journal pages...

Hello to all! 

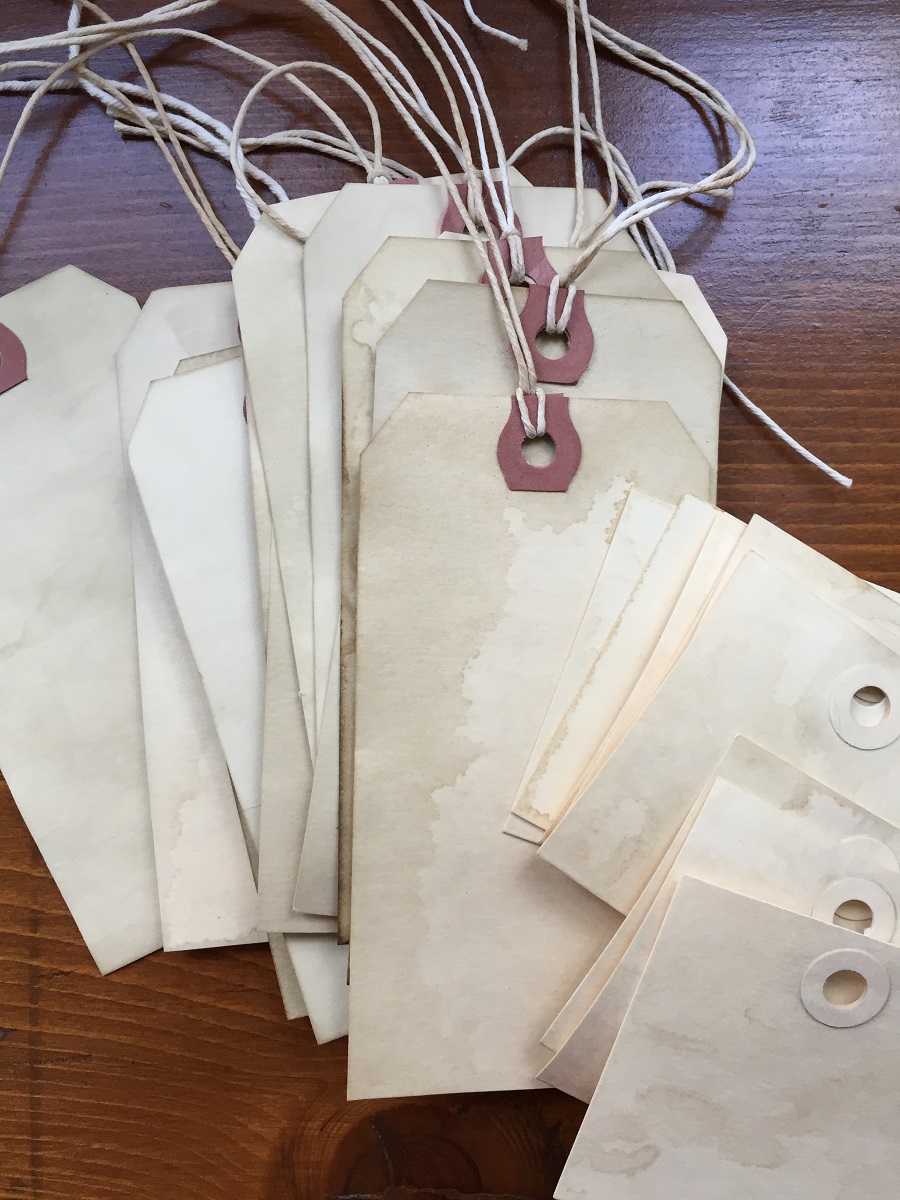
Last week, when I didn't have much to do, I copied some old documents to use in my junk journals. It would be nice to say that I was going to use originals of everything, but since the vintage papers of the world will not last forever, and some are a little pricey, using originals would be cost prohibitive. And who am I to destroy something that has "lived" for the last 100 years or so.

I managed to fit two to a page for most of 
the smaller pieces.
I did not use coffee-stained paper because
the originals already had a lovely aged
patina, 
so I just printed them out
in color as is on ivory resume paper.
That way, the backs, which could be used
for journaling,
are not too stark of a white...


The next one was a very faint script,
so I had my printer darken it a little first...


You may remember this beautiful cradle
roll certificate (top), which I think
I shared with you a while back...


Some of the originals were folded up,
and I did the same with the copies and 
already used one as a journaling spot on 
one of the journal pages I created yesterday.
Here are the pages.

*********************************

The page below was just torn from an
old book that I had for years.
It had some of the cutest illustrations.
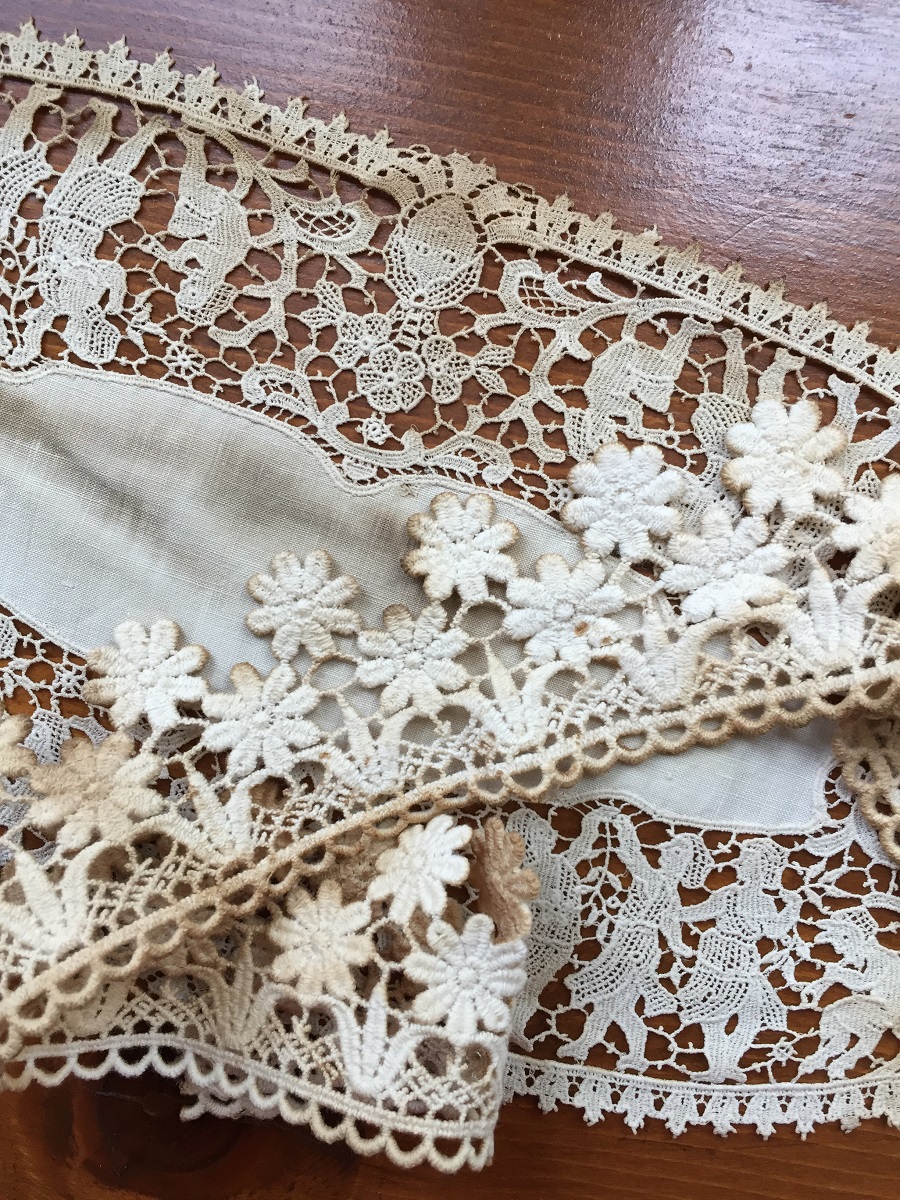
I embellished it with old lace,
and a piece cut from a cutter quilt
fastened with an old button.
This is the back of the Bingo page that
I showed you a couple of days ago...


Facing the above page is this pocket page.
The pocket was formed with a vintage hanky,
and further embellished with some other
bits and pieces.
The tag was created from a copy
of one of my old photos,
which I embellished with glitter,
crinkled seam binding and a key charm...
Peeking out from behind 
another pocket behind the tag 
is the folded up version of one of the
copied vintage papers appearing above...


...and gives someone a lot of room to journal on the back of...


This is the top of the tag.
I've also been enjoying using the embroidery
stitches on my Singer, which I bought a year or so
back and haven't had much time to use.
I love this pretty tulip stitch... 


It's really been fun creating just for the fun of creating
rather than making stuff to try to get into
my Etsy shop, or something for an entry into a magazine.
Not sure where this will take me,
but I guess we'll see!

I hope you have a wonderful day!

Wednesday, July 5, 2017

A "crafty" shopping spree...

Hello there!

One day last week I did something that I have not done in quite some time, namely, I went on a crafty shopping spree. Michael's and Hobby Lobby loved me.

Below are my purchases, all with the hope of using them in junk journals.

Kraft envelopes, Tim Holtz doo-dads,
and two sweet rubber stamps.
I don't buy many stamps anymore...


More doo-dads, and some washi tape,
little of which I have used in the past...


At some point I want to make a ballerina-
inspired junk journal,
so I loved these...


These stick-on word pads are great,
and you get a lot of bang for the buck on them.
And two distress ink pads in colors that 
I never had.
Sometimes they are hard to find
around here...


More cool embellishments,
which were buy one, get one...


And these two.
How could I resist the birds?...


I bought one of these Jim H
paper packs before and fell in love with it,
so bought another.
Beautiful botanicals in this pack.
I thought it was discontinued.
Also the little cutout "people"
which will be lovely in journals, cards,
or anything else for that matter...


I thought this stamp pack
would be awesome for journaling...


Some paper fall leaves,
and mini wooden clothespins in
neutral colors...


Recently, on Caterina Giglio's blog
(see my sidebar) she had a sweet video
tutorial for something she did with
photos of flowers.
I think I will try it. 
Thanks Cat!
She uses Mixed Media paper,
which I have not tried before...


The chipboard word cutouts below were to die for.
I will likely never have a machine that does this,
so these ought to hold me for awhile...


And these two kraft chipboard books
were so pretty to me.
They were cheaper than it would cost me
to make them...


And though I don't buy too much Halloween
stuff because it is too "cute",
I loved this stamp and these embellishments.
Maybe my next journal will be a 
Halloween one.
I can only dream!


Most of this stuff, if not all,
was on sale, so it was not that big of an investment.
Now I just need to find an organized place to put it.
Right.

*************************************

OK. Another post about basically nothing!
Thanks so much for coming by. 


Saturday, July 1, 2017

Having fun with coffee staining...

Happy Saturday and I'm hoping that yours is a nice holiday weekend. We did not have any plans, and The Mister is not feeling well, so I am having a stay indoors party working on some crafting and getting ready for my foray into junk-journaling. It's pretty hot outside so this is not a bad thing.

During this past week I saved unused coffee for a few days and experimented with more coffee staining. I used the process that I talked about here.

Here is a mix of stuff that I stained...


It includes tags...


...and more tags...


...envelopes...


...other odds and ends...


...tickets and glassine bags...


...various notebook papers...


...and even some scrapbook papers...


These were in various strengths of coffee...


...and this one I experimented with painting
on the coffee through a leaf stencil...


The above papers were printer paper,
but the ones below were different colors of 
thicker card stock.
The pink in front picked up some of the
green that I had set behind it.
Interesting effect I think...


And today, I cut some in half,
and dry-brushed on some cheap white
paint...


While I had the paint out,
I ripped up some corrugated cardboard
and dry-brushed some of the paint on it...


And I coffee stained some lace and a doily.
These were not old and too white for my taste.
They came out pretty nice...


It felt good to play for the sole enjoyment of 
having fun, and not worry about what I was actually 
going to create with it.

Have you played with anything lately that you will use in your art?

Thanks for coming by!

Tuesday, March 21, 2017

Coffee-staining paper...

Good morning my friends!

Years ago when I first started taking collage classes at one of the rubber stamp stores that my friend and I went to when I lived in Florida, we did some work with coffee-stained paper. In the essence of time, the instructor had already stained some tags for us to use, but I never actually did much coffee-staining myself. I always had the intention of doing more, but of course I never really did.

When I decided recently that I was going to start working on some junk journals, I looked at several tutorials on the process, and of course, everyone has their own way of doing it. This weekend I combined a few techniques and stained some myself, alternating between regular white printer paper and ivory resume paper just to compare the outcomes. There wasn't really a marked difference between the two, so when I do it again I will continue to alternate, using whatever I have on hand.

No complicated technique at all. Here is my process:
  1. Mix a strong batch of instant coffee. I mixed it in a 4-cup Pyrex measuring cup, using two cups of almost-boiling water and a couple of heaping teaspoons of coffee.
  2. Cut several sheets of waxed paper to fit two old cookie sheets. You will need the same amount  as the number of pages you hope to stain. (For my first run I found 16 sheets of paper a good number to work with.)
  3. Lay one sheet of waxed paper down on one of the cookie sheets with a sheet of printer paper on top.
  4. Using a cheap 2-inch wide bristle brush, "paint" the coffee onto one side of the printer paper, then flip it over onto the waxed paper and "paint" the other side. Don't completely soak the paper. 
  5. If desired, you can sprinkle a few coffee granules randomly over some of the wet pages to give some of your sheets an even more aged look.
  6. Place another piece of waxed paper on top of the page you just stained, then add your second piece of printer paper to the top. "Paint" each side as you did in step 4.
  7. Repeat this process until about 8 pages are stained, each time alternating the paper with the waxed paper, stacking them as you go along. They will be a bit buckled but this is a good thing. 
  8. Do the same thing with another batch of papers on the second cookie sheet.
  9. Set the trays aside to dry over night.
  10. The next morning the top ones will be pretty dry, but the ones underneath will still be a little damp or wet. So spread them apart on a protected table or counter, each one with the sheet of waxed paper underneath it. This way they will dry faster.
  11. After they dry, iron the pages, one at a time, to flatten them out a bit. Place a piece of muslin over the paper, press using the cotton or linen setting, and do not use steam. Flip over the page, and iron the reverse side, this time without the sheet of muslin. They won't get real flat, but after all, they will be used in a junk journal!
  12. After each sheet is ironed, take a look at the waxed paper sheets. You will find that they are also coffee-stained and have a marvelous color and texture. They will take on a vellum effect and could be used for little aged envelopes, or additional pages in your book. Or, you could just reuse them for your next bout of coffee-staining!
Here is the batch I did this weekend.
The page in the middle with the dark stain was from
adding the extra coffee granules.
To me it looks really old...


Each page will be so different.
This one looks like a paw print from
an animal!...


The darkening at the edges happened all by itself.
Almost the way the pages in an old book
actually look.
And the delicious smell of coffee isn't bad either!...


So, since the first journal I hope to make will be
nature-inspired,
I couldn't resist copying a couple of pages from
one of my vintage botanical books
onto a piece of my lovely "aged" paper.
Happily, the paper slid through the copier without
a problem.
What a pretty effect this had,
and I didn't even use my printer's "best" setting...


And then, of course, this led to planning
some papers for the cover of my book,
which will be made from a vintage
Reader's Digest book cover,
 covered with this
pretty pink and green paper,
a little corrugated cardboard,
and whatever else I decide to add...


And here is how the waxed paper ended
up looking...


Here it is on an ivory quilt so that you can
get a better idea of how it looks.
This part wasn't mentioned in any of the
tutorials that I saw,
but I really liked getting twice as much
"stuff" for my efforts...


Next time I will try this with tea. Perhaps some nice cinnamon-apple. 
My, wouldn't that make my journal smell good!

I'd love to know about any experiences that you have had with aging paper.
Thanks for coming by!


Saturday, July 9, 2016

Christmas in July: Vintage Santa Photos

Merry Christmas! Well, not exactly, but I am celebrating "Christmas in July" in my etsy shop by listing a few vintage Santa Claus photos.

I have scanned six photos from my personal collection 
and made them available as digital downloads....


They would be perfect for holiday cards or gift tags.
Or, a few of them would be lovely incorporated into a Christmas banner.
If you like them you can find them here.

I would love to see what you might make with them!
Don't eat too much Christmas ham today.