Tuesday, April 29, 2014

Return to Birdsong Cottage: Plumbing and Gardening at the Single Wide Mobile Home Getaway Place

Hello friends! I hope that you are having a great day. 

Well, we returned from the mountains this past Thursday, and accomplishments up there in our little place were pretty good, after a slow start due to the first two days being cold and very rainy. Like, rainy for almost 48 hours straight.

We had the place dewinterized (is this a word?) before we got up there, and apparently there had been some old rust that had worked its way into the pipes, which caused little to no hot water pressure in the hot water taps of the kitchen and Hubby's bathroom sink. We decided that part of the problem in the kitchen was also caused by the old faucet, so we replaced it with a lovely new oil-rubbed bronze one which now matches the lighting, cabinet knobs, and ceiling fans throughout. I guess there's a bright side to everything! And before we go back next month, we have someone coming in to replace the old copper plumbing under the sinks with new PVC.

Sorry for the dark photo, but I snapped it rather 
quickly  with my cell phone as we were trying
to tidy up right before leaving to go home...


In the kitchen 
we also hung up a piece of chalkboard art
 during the winter, 
and framed it in this pretty frame purchased
at Pier One...


So, after the weather suddenly turned warm and sunny, I did a bunch of landscaping trying to give our little place some curb appeal, that would hopefully last all through the fall.

There were probably about 100 very old hostas planted along
the side of the porch, with no rhyme or reason as to how they
were growing. I knew that somewhere in there was a group 
of struggling daylilies. 
So I dug a bunch of the hostas up 
(I liken this struggle with trying
to dig up the concrete foundation of a house,
as the roots were so firmly entrenched in the ground!),
separated them, and found the daylilies, along with
several iris plants.
There were a lot more daylilies than I saw bloom
last year, so I divided those too and moved several plants...


...to other areas of the house, 
like between the steps to the other side
of the home and the storage shed. 
(Pardon the ugly old dryer vent back there,
especially since we have no washer or dryer
in this shrimpy little place!)
I also reused all of the edging wood and 
concrete trim pieces, so it's kind of cute and
quirky in its own way...


In the front of the house, there were five sweet bushes already
there, and actually planted in a nice arrangement, 
so I worked around them by adding two new purple daylilies,
and a flat of white petunias.
I tried to work it so that only the annuals would need to be 
replaced each year.
Almost maintenance free. 
After all, this is a vacation home.
Some nice dark brown mulch completed the project...


My little boy holding the birds, purchased last year,
 finally found his home (sitting in front of the old trailer
hitch used to tow this old gal to its site 45 years ago!!)


While I did this, Mr. Perch busied himself with the awful
task of attacking all of the stones that the previous owner had put in 
behind the driveway and carport to accommodate his truck.
They looked horribly ugly and we couldn't keep the weeds out.
So Hubby bought edging strips and weed barrier, and bedded out
about a foot around the rest of the house with the stones so that when
the yard maintenance crew comes in to mow, they don't need to get
too close to the house.
He particularly loved the fact that since we have no wheel barrow
up there, he had to do it with a bucket, bit by bit. 
And survived the experience!
He then planted grass seed in the area behind the carport 
(even though we don't own the land there,
we still want it to look nice).

After all was said and done, Mr. Perch commented on how nice
it was to complete a whole landscape plan in less than two days
(unlike at "real house" where we never seem to be done,
but more on this haven in a future post!)

Oh, and did I mention how nice it was that after dividing and 
moving the plants my only costs for the garden plan was the flat
of petunias and the two new daylilies, aside from the mulch.
Well, not exactly, but more on that in my next post!

I can't wait to see it all when it's blooming and filled in, and I will share it with you. Even if it looks bad. And, if you have not been in on the saga of Birdsong from the beginning, you can find last year's posts on my sidebar label of Birdsong Cottage. 

Have a great evening. I hope that your fingernails are cleaner than mine! 
Saturday, April 19, 2014

Happy Easter from Birdsong Cottage!


We are up at Birdsong Cottage this week, 
but I wanted to take a minute to wish you and yours
a wonderful Easter!

Wednesday, April 16, 2014

Signs of Spring: Tulips and Daffodils

Good morning friends! 

In spite of the fact that we still are getting a few cool days, there is a lot blooming around here and you can tell it is spring, even though it got off to a late start.

In the fall we planted some tulip and daffodil bulbs in front of Birdsong Cottage, and since there were more bulbs in the bags than would fit in the area that I was planting them in, I brought the rest home and planted them in pots at this house. (Our soil is not very good here, and between that and the moles and voles, tulip bulbs never seem to survive the winter. I have found out that starting them in pots and then transplanting them later seems to be the answer. Daffodils seem to do a lot better.)

Here they are sitting on the steps to our front porch.

Professor Einstein Daffodils...


Bright Parrot Tulips...


...and a closeup.
Isn't she beautiful?...


And here's how they look together.
I planted them together at Birdsong,
and can only hope that they bloom at
the same time up there!


We will find out tomorrow when we go up there to 
open the place for the summer!

You may not hear from me until I get back. 
In the meantime, enjoy the weather.
I hope that yours is good!


Tuesday, April 15, 2014

Painting Patio Furniture for the Porch at Birdsong Cottage

Hello and good evening! I hope that you're well.

This week we did a bunch of spring cleanup in the gardens, widened a flower bed, planted the herb garden, and transplanted a bunch of daylilies and irises that were not doing well where they were. While I was working in the newly widened flower bed we also dragged out the patio set that I recently bought for Birdsong. (You can see that post here.)

We parked the table and chairs in the woods, 
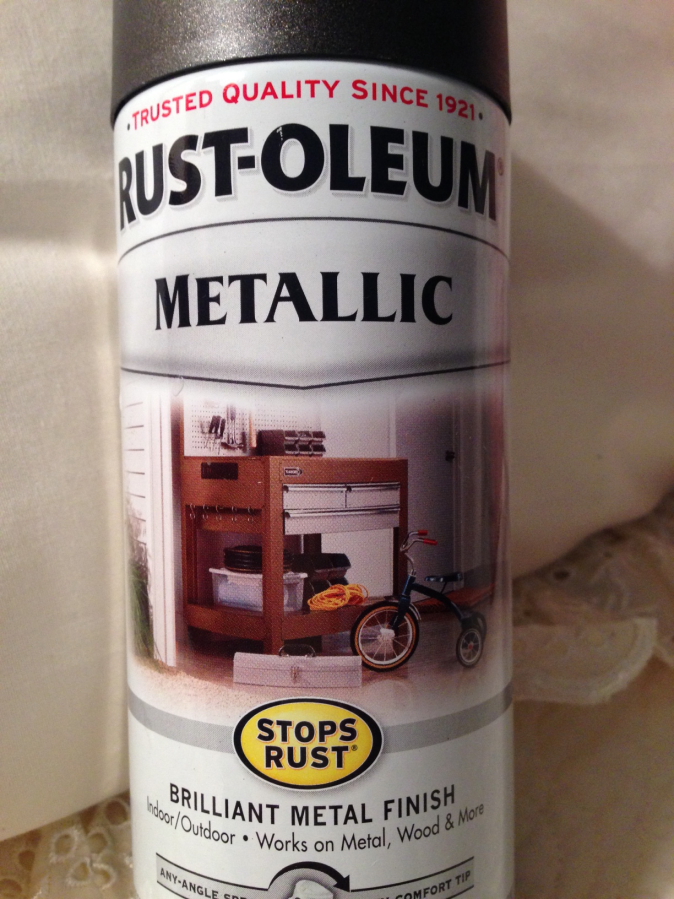
and I spray painted them with this.
Brilliant Metal Finish is very similar
to the Oil-Rubbed Bronze that I used
last summer on many things...


I started by placing the table and chairs upside down 
and painting the bottoms first...


...and after drying, turning right side up and painting the tops.
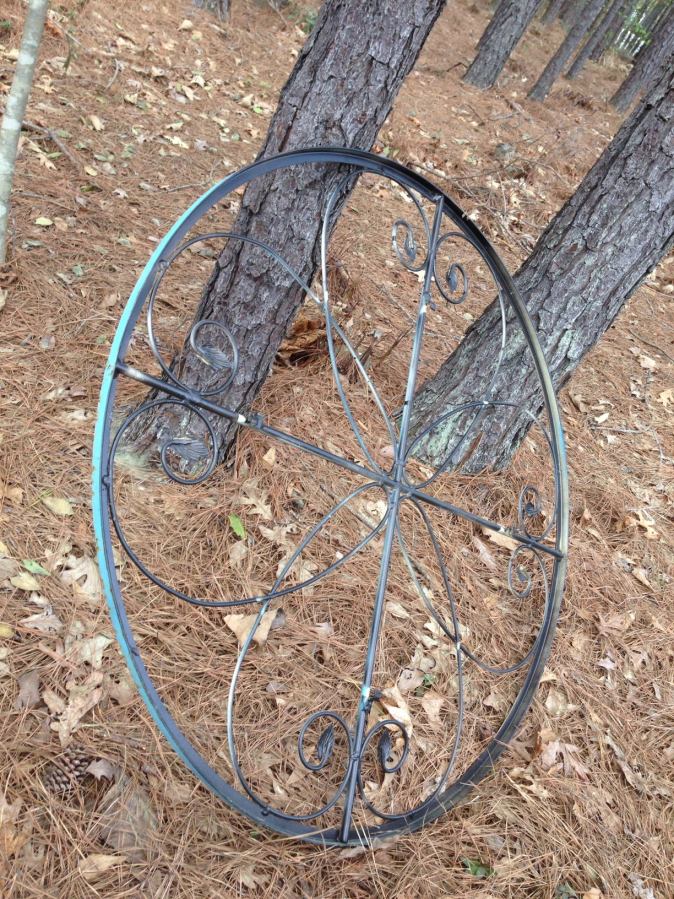
This picture shows the blue color that the set was when I bought it,
with some yellow of yesteryear's paint job also showing through.
Don't you just love the pretty design left on the drop cloth by...


...spraying the table top?...


I guess the "stencil" on the drop cloth is the
closest I've come to any kind of art lately!!

This is the last piece of furniture that we needed for the porch, so at some point I'll show you how it all comes together, if it ever does!!

Thursday, April 10, 2014

Creating for Avery Grace: A Pretty Baby Card

Good evening friends. I hope that you're doing well!

If you're anything like we are, the warmer weather is such a treat that we've been spending as much time outside as possible, mostly getting the yard in shape by cleaning up the winter debris, mulching, weeding, spraying, fertilizing, and moving and dividing some plants. Wow, it really feels good to work in the fresh air for a change.

So. of course, I have not had much time for crafting (the story of my life), but I did send a package down to Florida for my new granddaughter, Avery, and at least had the time to create a little card and something else to go with the actual gift. Here is what I made...

Is there any law that you have to use actual baby paper
to wrap a baby gift? I couldn't help using this vintage-like
rose paper that I bought a long time ago,
because...


It so perfectly matched the scrapbook paper
that I used on the card. It is from the Lost and Found
collection of My Mind's Eye.
If you follow this blog, you know how much
I love that paper!
You also probably know that I collect vintage
photos of Victorian-era babies in their 
buggies, and this one is my absolute favorite.
My son and daughter-in-law have two dogs,
so need I say more about why I used 
this one!...


Isn't this one of the most beautiful old baby
photos you have ever seen?...


Because I can never find cards that say exactly
what I think that they should say, I usually
search quotes for just the right thing,
and found this one.
I printed it out in colors that matched
the card. 
(I forgot to take a photo of the inside of
the card before we signed it,
so unfortunately, this is just the quote,
and not how the inside of the finished 
card actually looked.)


Then, I had this crazy idea about using one
of my vintage hankies as part of the gift. 
It just so happened that
its lace perfectly matched the old lace that I
used on the front of the card.
So I made a little gift tag from a another
piece of scrapbook paper...


...tied it with the hankie...


...and wrote the sentiment on the back of the tag...


"Something old" for her future wedding day!
I couldn't get over the fact that the laces
all had roses on them that matched the paper.
Do you get excited over stuff like that?

And I guess that Avery likes pink.
Here are the latest photos...

Florida girl...


...and Mommy's girl...


Many thanks for stopping by!